Soft Slab Fun

Monday night Cheryl spent the entire class teaching us several different techniques for building objects using slabs of soft clay. We learned different techniques for rolling out our clay, and texturing it before building with it.

I went wild Wednesday night on the texture!

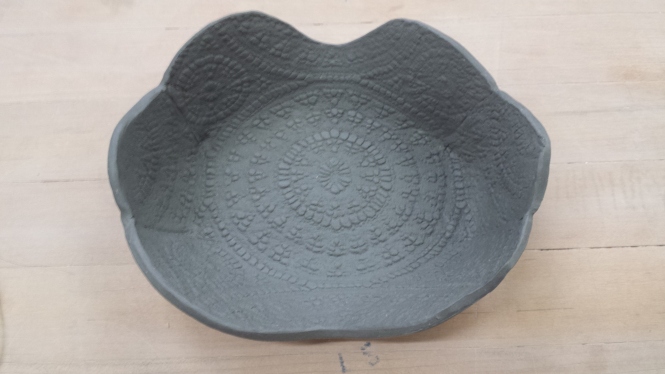
On my first piece I used a piece of old lace to texture my clay before using a wooden plaque to cut the shape out. I cut darts in four places, scored and slipped them before joining to create the curve of the bowl.

20180131_210114

Next, I used a bunch of different textures on one big slab of clay. I cut several small shapes from another wooden plaque, I turned a few into tiny bowls, and left some flat. I plan to use them as my glaze “test tiles”.


20180201_120823

I learned that by pressing down on the wooden plaque while it is placed on top of the clay, on a big piece of foam will create a cool lip on the side of the piece. Before pressing pick it up and look at all sides to make sure they are even.

I sure learned a lot, of what not to do…

a yard stick width, is too thick

my signature stamp pressed on the back, flattens out the texture in on the front (so don’t texture the middle part of piece

be careful when rolling over the texture so you don’t move it

remember to remind Joe not to drive off before I grab my work off the dashboard. Yikes!!! luckily only lost one item.


Christmas morning AKA glazed pieces out of the kiln

My teacher Francie was so right when she said seeing your glazed pottery would be like Christmas morning. You just never know what to expect, some items surprise you and others disappoint.

This slideshow requires JavaScript.

The above is my favorite piece. It is glazed with yellow salt after round sticker were applied to the bisque. I love how parts of it browned.

Below is the disappointment. The painted OM symbol and “be here now” didn’t show up after the glaze fire. I dipped the mug in Butter Ranch glaze and the letters are painted on using Malcolm Dave’s Shino.

This slideshow requires JavaScript.

and the rest of my presents 🙂

These two blow my mind! They were done opposite yet they look the same (except the insides). Glazed with John’s Red and Lil Street Tinmoku. The mug was dipped completely in John’s Red and the the top part was dipped in Lil Street Tinmoku. The chunker cylinder on the left was dipped the opposite way.

This slideshow requires JavaScript.

Below, I believe I used Reitz Green and the three dips method. I am thinking the top dip ended up inside the cup. Pretty wild how the single dip is brown, not green.

This slideshow requires JavaScript.

Below is a wax resist. On the inside of the mug I used Nick’s Yellow and then dipped the whole mug in Pale Blue Celendon. The yellow and blue made green on the inside 🙂

This slideshow requires JavaScript.

Below, I used blue jean glaze. I did three dips. First, whole item dipped using tongs to hold the cup. The second dip was done while holding the mug upside down, and inserted into the glaze up to the second carved groove. The third dip was again done the same as the second and dipped up to the first carved groove.

This slideshow requires JavaScript.

Below I choose John’s Red glaze. Again I did the three dips technique (it is an assignment). The third dip is just on the rim of the cylinder.

This slideshow requires JavaScript.

My work ready for the kiln

In class tonight we learned how to load the kiln. I was surprised how much you can fit into one. Not everything of mine was dry enough to load. I was able to tell by how cold it felt when held against my cheek or inside of my wrist.

This slideshow requires JavaScript.