Hard Slab Box Casserole Dish

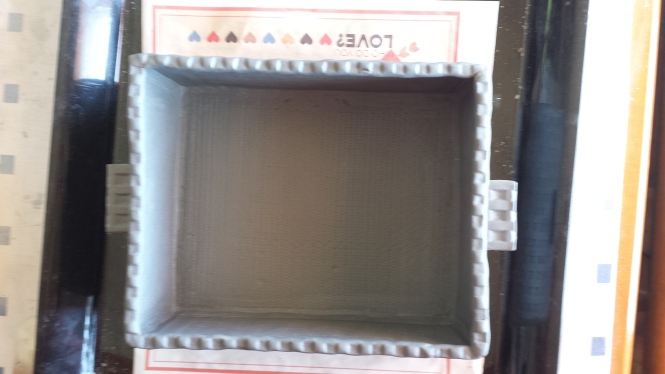
I started this on Wednesday. My slab took forEVER to harden enough to put it together. When I started I had a brownie pan in mind, but the sides and corners are pretty straight. Guess that doesn’t really matter since I usually put parchment paper down before my batter.

20180222_114418(1)

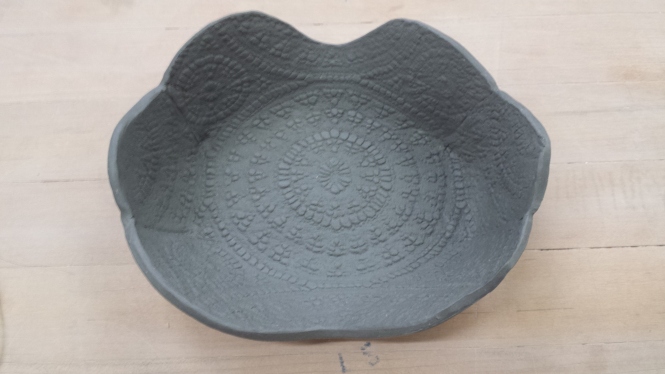
I used this wooden foot massage to texture my slabs before I cut them out. The inside of the slab pieces were textured with a coloring texture pad that has a subtle chevron pattern.

20180224_144743

I struggled for a few days to figure out handles that would go with the piece. Grateful I can design in my head 🙂

I decided to texture a coil with the tool above, which flattened it out a bit and made it easier to attach. I also used it to texture my two rectangle handles. I am VERY pleased with the outcome!

20180224_14341820180224_143408

Now, to figure out the best glazing technique to highlight the texture…decisions, decisions…

Looking at the newspaper it is sitting on…laughing.. It’s in your hands… Love? Yes! I do!

Soft Slab Fun

Monday night Cheryl spent the entire class teaching us several different techniques for building objects using slabs of soft clay. We learned different techniques for rolling out our clay, and texturing it before building with it.

I went wild Wednesday night on the texture!

On my first piece I used a piece of old lace to texture my clay before using a wooden plaque to cut the shape out. I cut darts in four places, scored and slipped them before joining to create the curve of the bowl.

20180131_210114

Next, I used a bunch of different textures on one big slab of clay. I cut several small shapes from another wooden plaque, I turned a few into tiny bowls, and left some flat. I plan to use them as my glaze “test tiles”.


20180201_120823

I learned that by pressing down on the wooden plaque while it is placed on top of the clay, on a big piece of foam will create a cool lip on the side of the piece. Before pressing pick it up and look at all sides to make sure they are even.

I sure learned a lot, of what not to do…

a yard stick width, is too thick

my signature stamp pressed on the back, flattens out the texture in on the front (so don’t texture the middle part of piece

be careful when rolling over the texture so you don’t move it

remember to remind Joe not to drive off before I grab my work off the dashboard. Yikes!!! luckily only lost one item.


Coiled Pots

Our second lesson was on coil pots I have to make three.

Here is my second one,

20180131_170508

This pot needs to be a finished size of 10 inches tall, 5 more to go. I used Brutus’ old metal food bowl as a base. I wrapped it with newspaper to allow for easy removal later. I put coils on the outside bottom of the bowl, and paddled them smooth, on the inside you can still see them. I created four coil circles and used them as a template for cutting into the base. I scored and wet the base before attaching the coil circles and the next three rows of coils.

I love that I am able to use the pocket stone Lexi gave me of Christmas to smooth out my clay.

I have a few options I am mulling around on how to finish it off….we will see what it wants to be.

Pinched Pots

This semester I am taking Hand Building Functional Ceramics with Cheryl Crownover, at SFCC. It is a lot different than working on the wheel, and I am having a blast. We are working with WES, cone O4 clay, which is white when fired. We will be introduced to using clay slips, englobes, and terra sigillata for colorants. So glad I thought to grab these pieces off the bisque firing shelf…sure I will be wanting to add more colors to them first.